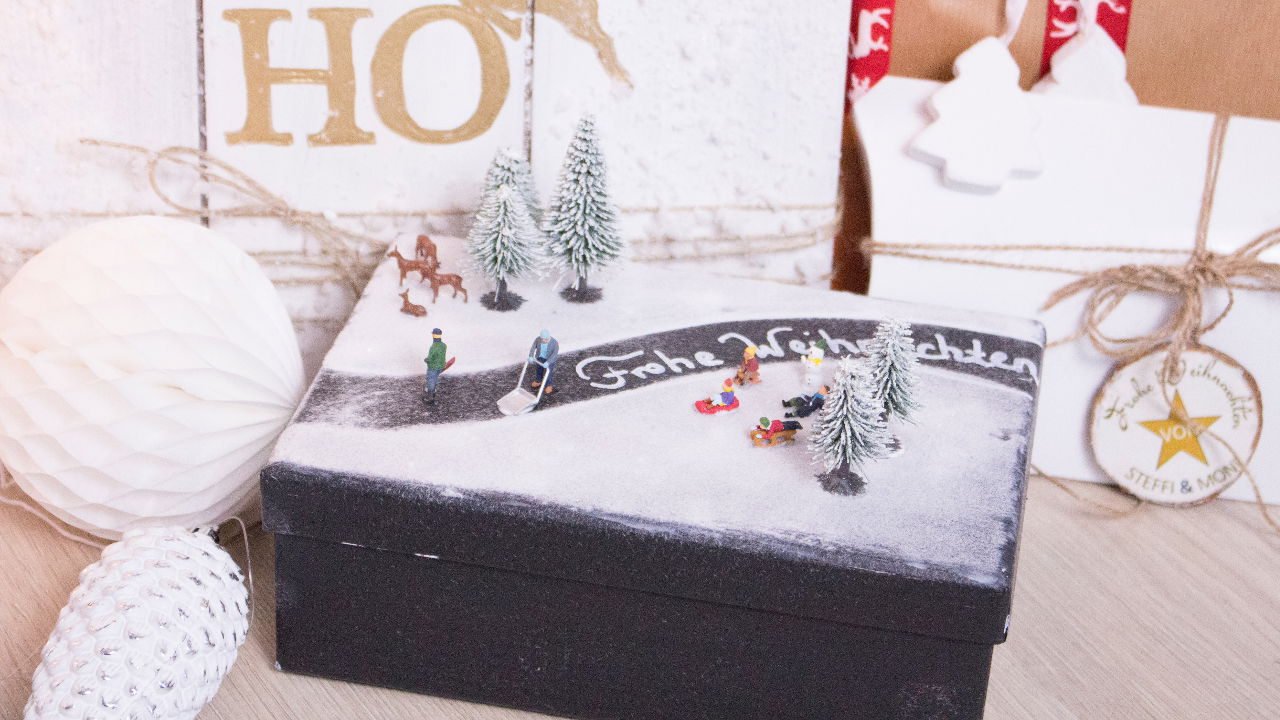
Merry Christmas!
A gift box DIY. Giving presents brings pleasure! But not only the recipient will be pleasured with the great gift box, you can enjoy the crafting fun first. Find out how to do it and what you need in the step-by-step instructions. A quick tip: With a little Christmas biscuit and a cup of mulled wine, crafting is even more fun in the cold weather! And if you get problems with your fine motor skills from the mulled wine, simply switch to children's punch.
Step-by-step instruction
Instructions from Steffi & Moni
Medium
45 min.
You need that
Box or shoe cartonBrush
Acrylic colour, black
Edding®, white
Start Set Snowflakes
Temporary Glue
Winter figures
Snow Fir Trees
A gift for the box :)
Acrylic colour, black
Edding®, white
Start Set Snowflakes
Temporary Glue
Winter figures
Snow Fir Trees
A gift for the box :)
01
 Get to the box")
 Get to the box")
 Get to the box")
1) Get to the box
Choose a box that´s big enough for your gift. Boxes with lids or simply a shoe carton are perfect. In the first step, you paint the box completely with black acrylic colour, so later you won't see what kind of box it was anyway. So just between us: After the cold season has just begun, we were shopping for shoes recently anyway, so just take the box from the last purchase. Oops - you left the shoe box in the shop?! Even better! Because now you have a reason for the next shoe shopping trip :)
02
 Street painting")
2) Street painting
The black acrylic colour has to be completely dried. Depending on the material, this can take an hour (it's best to bridge the drying time with biscuits and mulled wine). After everything is dry, grab the lid and draw the contours of your street with a white Edding®.
03
 Let it snow!")
 Let it snow!")
 Let it snow!")
 Let it snow!")
3) Let it snow!
And now we let it snow! First, make a funnel out of a sheet of paper by rolling it up. Than unpack the Start Set Snowflakes and take out the Puffer Bottle. Unscrew the red lid, take the small grey sieve from the bottle and put your funnel into it. Cut off the tip of the bag with the snowflakes and carefully fill the flakes into the puffer bottle. Replace the sieve, screw the lid on and shake everything firmly for half a minute. By shaking, the small snowflakes rub against the plastic inner wall of the bottle and thus become electrostatically charged. Now paint the surface to the right and left of the road on the box with the white snow glue, which is also included in the starter set. Then screw the lid back from the puffer bottle and blow the snowflakes evenly into the glue by pressing the bottle. This creates a fluffy blanket of snow. Finally, knock out the lid of the box over an empty cardboard box and collect the snowflakes again for your next DIY.
Tip: The contents of the starter set are enough for approx. 2 boxes, depending on how big your shoe boxes are. If you want to make even more gift boxes, you can also order the puffer bottle, snow glue and snowflakes separately.
04
 Decorate with figures and snow firs")
 Decorate with figures and snow firs")
4) Decorate with figures and snow firs
Now it's time to design and decorate: You need a few winter figures and snow firs. Stick them under their feet in the winter landscape with a dab of temporary glue. The great thing about the temporary glue is that you can remove the figures at any time and place them elsewhere. If you want to fix them firmly in place, simply use a hot glue gun and stick the figures and fir trees permanently into the little snow landscape.
05
 Merry Christmas!")
5) Merry Christmas!
If you have glued the snow fir trees and figures with the temporary glue, you can now remove them again to make writing easier. If you use hot glue, first write your dedication or "Merry Christmas!" on the street and then stick everything in place.
Your crafted results

Now all you have to do is put a matching Christmas present in the gift box. How about a homemade snow ball, for example?
We really hope that you enjoyed crafting and you like the result! We wish you a great Advent season and a Merry Christmas!
Greetings,
Steffi & Moni

Featured products
Shopping List


More creative inspiration
Explore similar Crafting-Tips
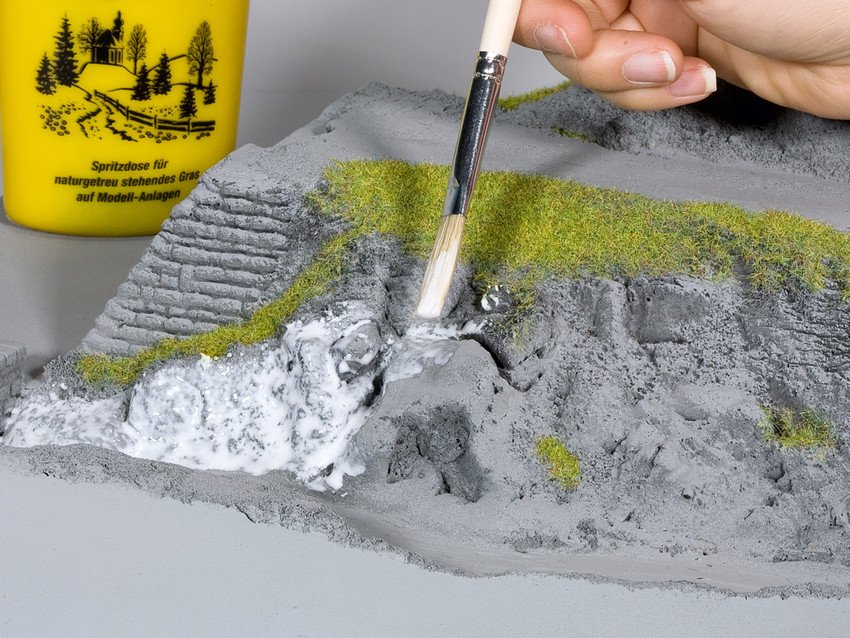
The simple processing of Foliage
In the first step, paint the desired area of the model with NOCH Grass Glue. Now detach a part of the Groundcover Foliage from the backing material and press it into the glue bed. The realistic ground
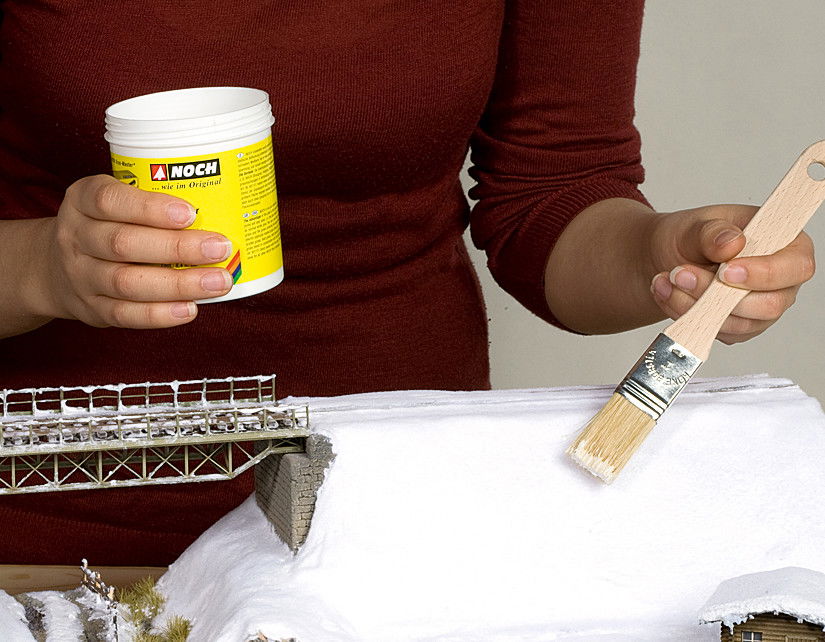
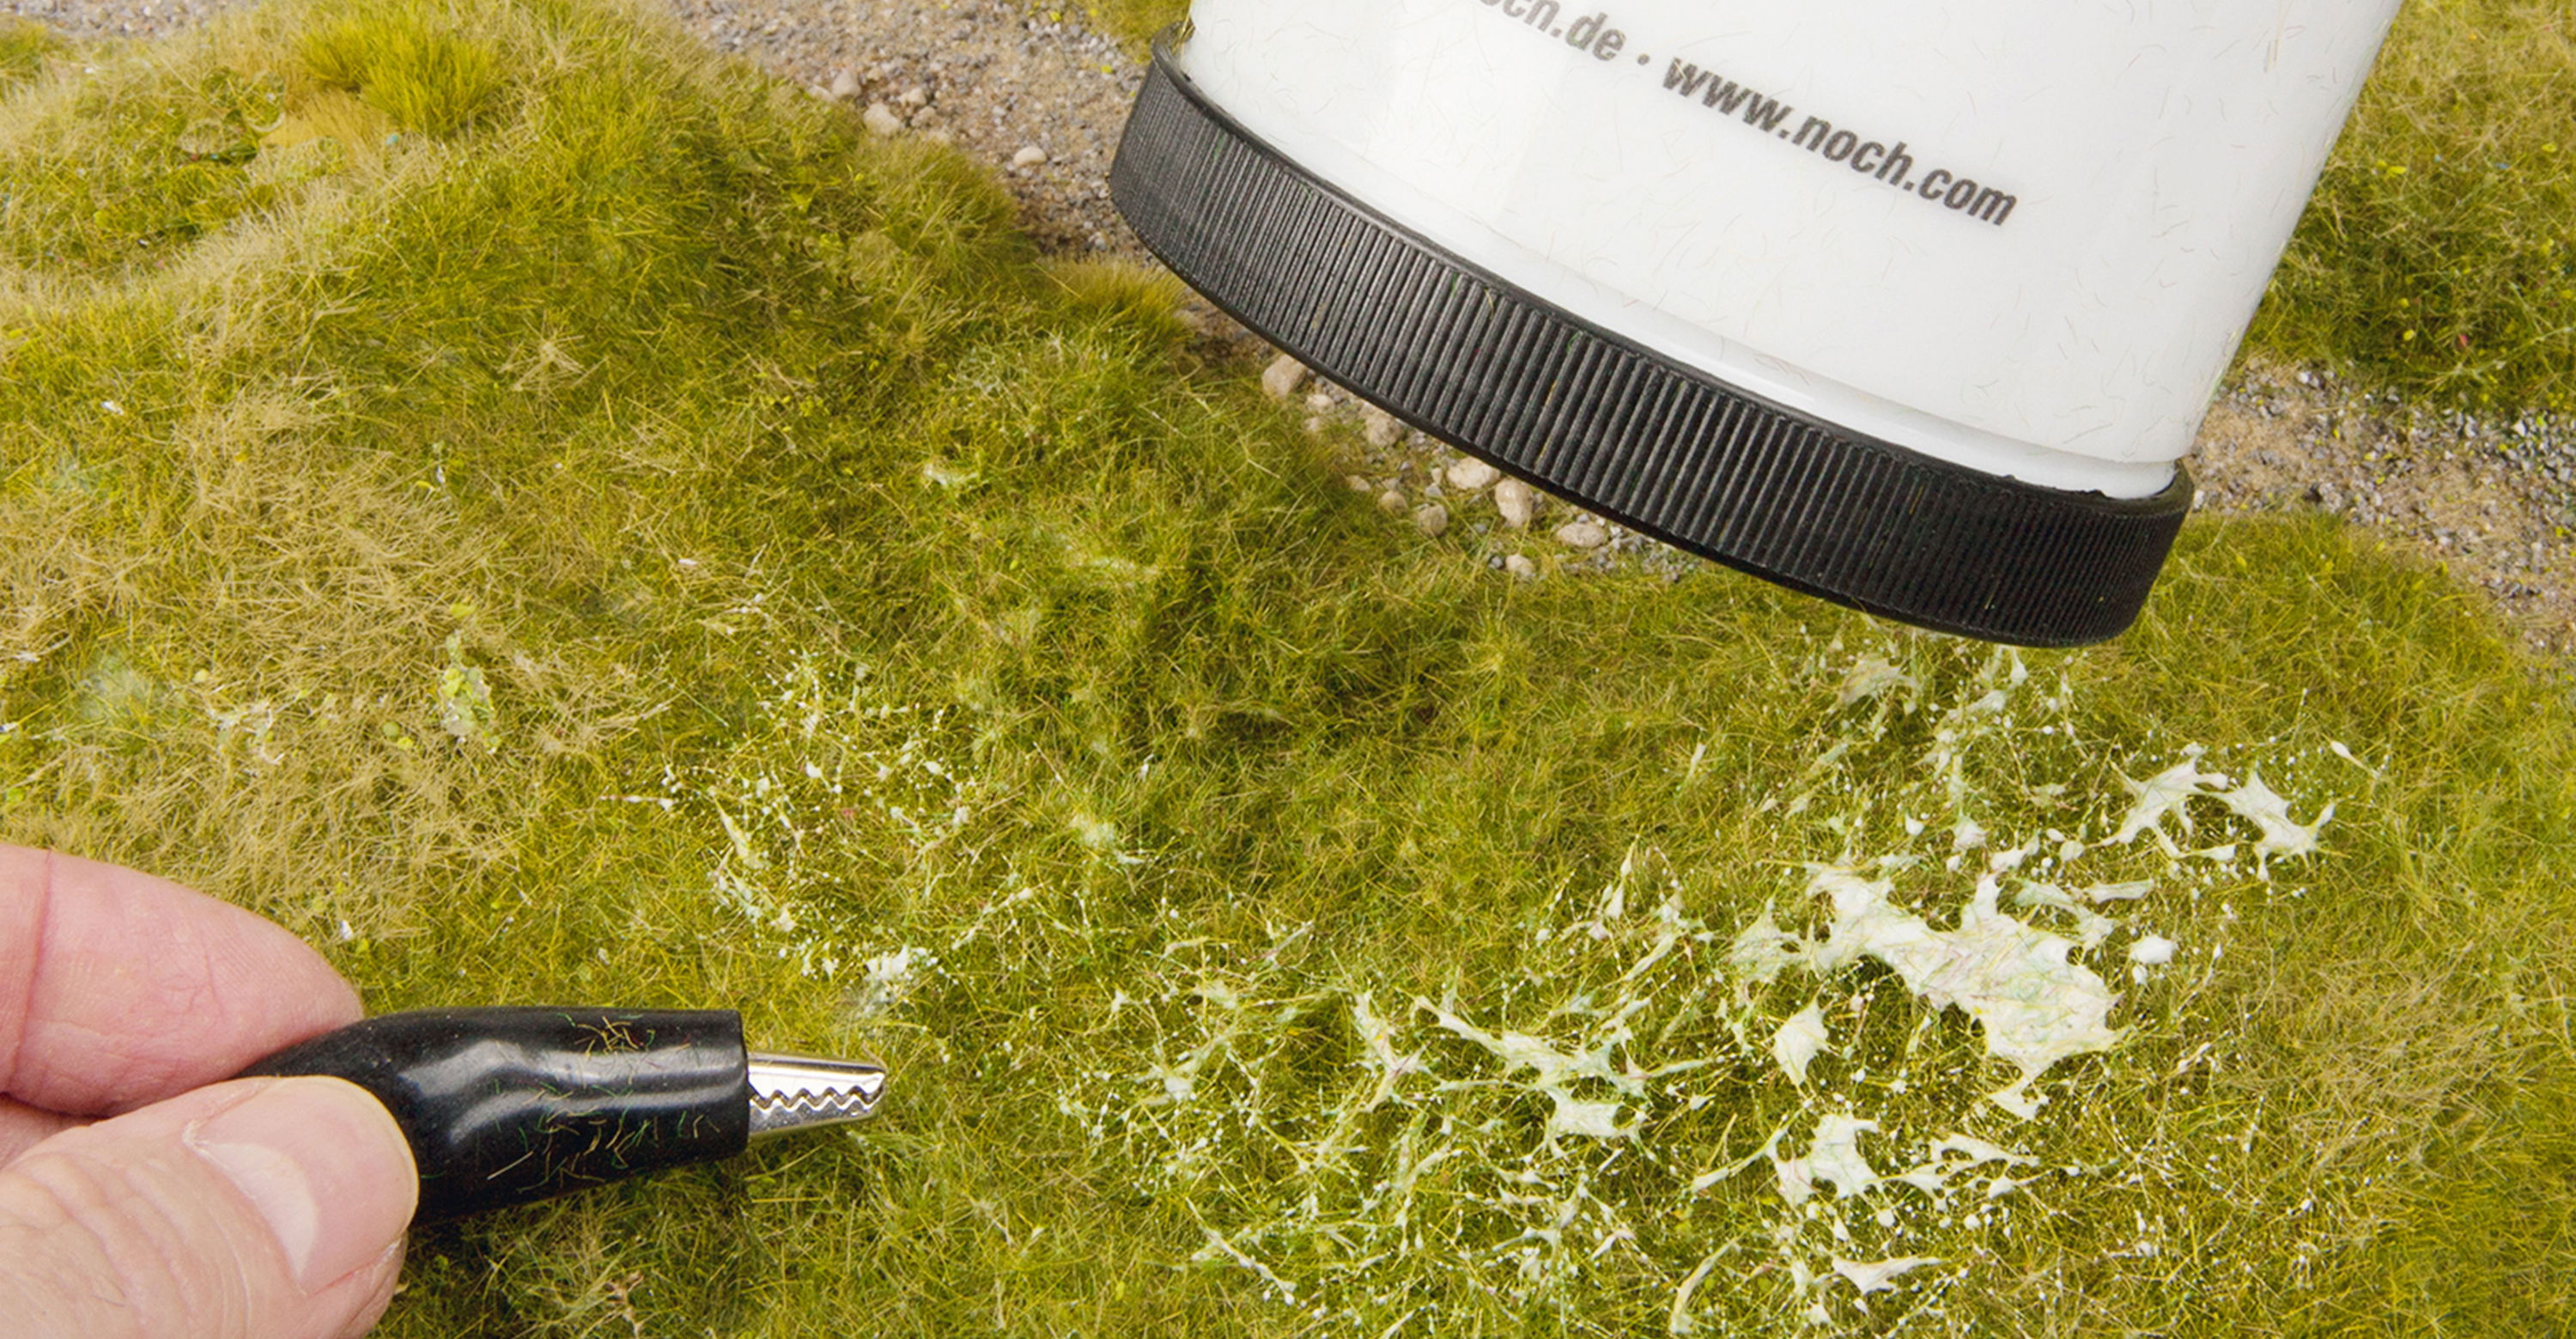
Realistic Snowflakes - Creating a winter wonderland in just a few steps
In order to create a true-to-life winter landscape, you can electrostatically charge the 1 mm Snowflakes with the Gras-Master or the Grass Puffer Bottle. The Snowflakes stand vertically on the ground
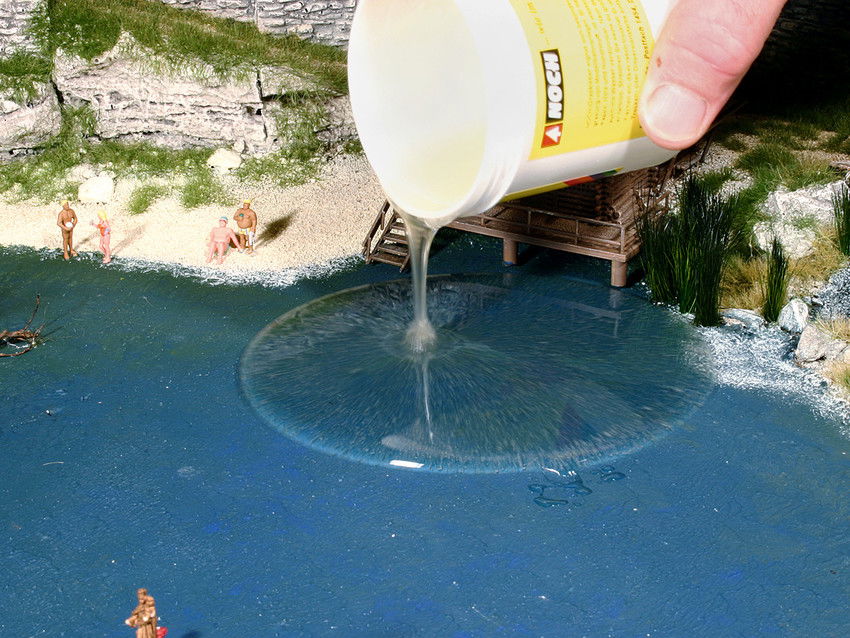
Creating the perfect body of water in just a few steps
When using Artificial Water, the substrate must be flat and watertight. If needed, you can also seal it with NOCH Modelling Compound. To design a true-to-life body of water, the stream or lakebed is f
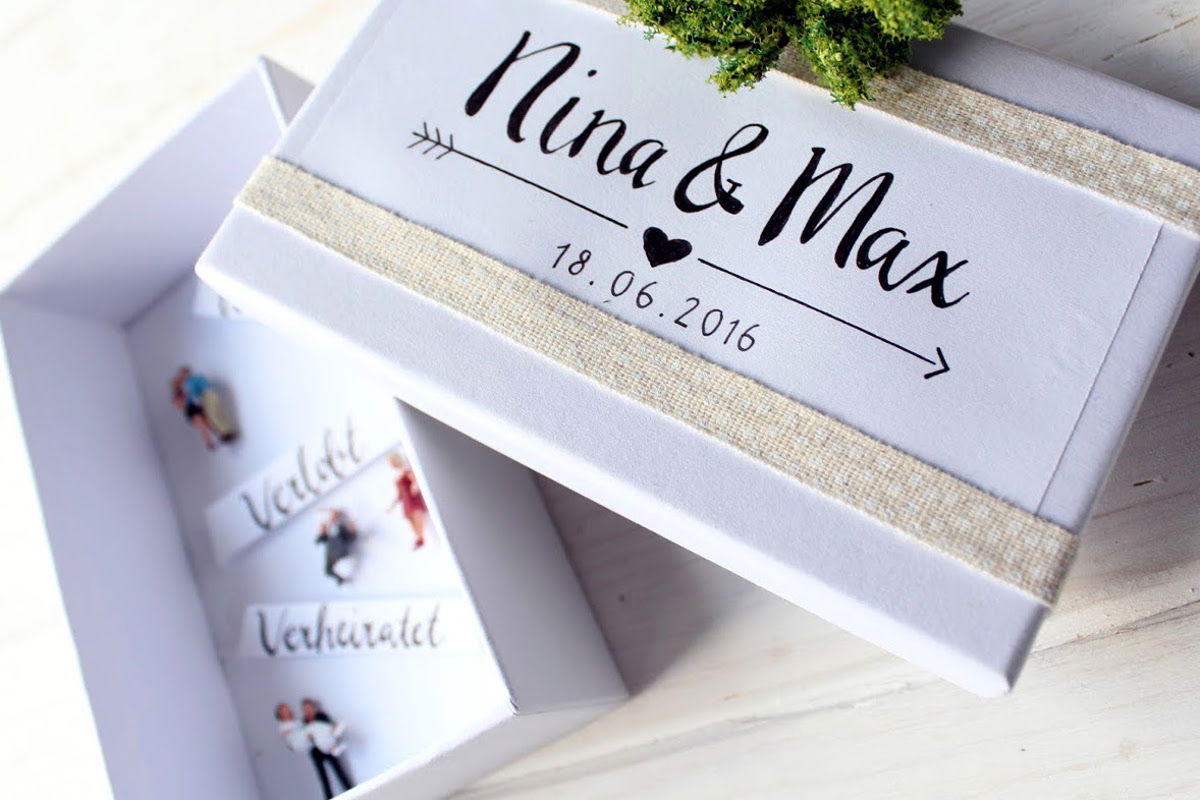
In Love, Engaged, Married!
Craft stylish wedding invitations. Everything should be perfect on this very special day in a couple’s life – the wedding! Great styling starts with the invitations. And so that you can craft a particularly pretty invitation, Moni and Sara from Feines Handwerk have come up with a great DIY project using NOCH kreativ Mini Figures. Have fun crafting!
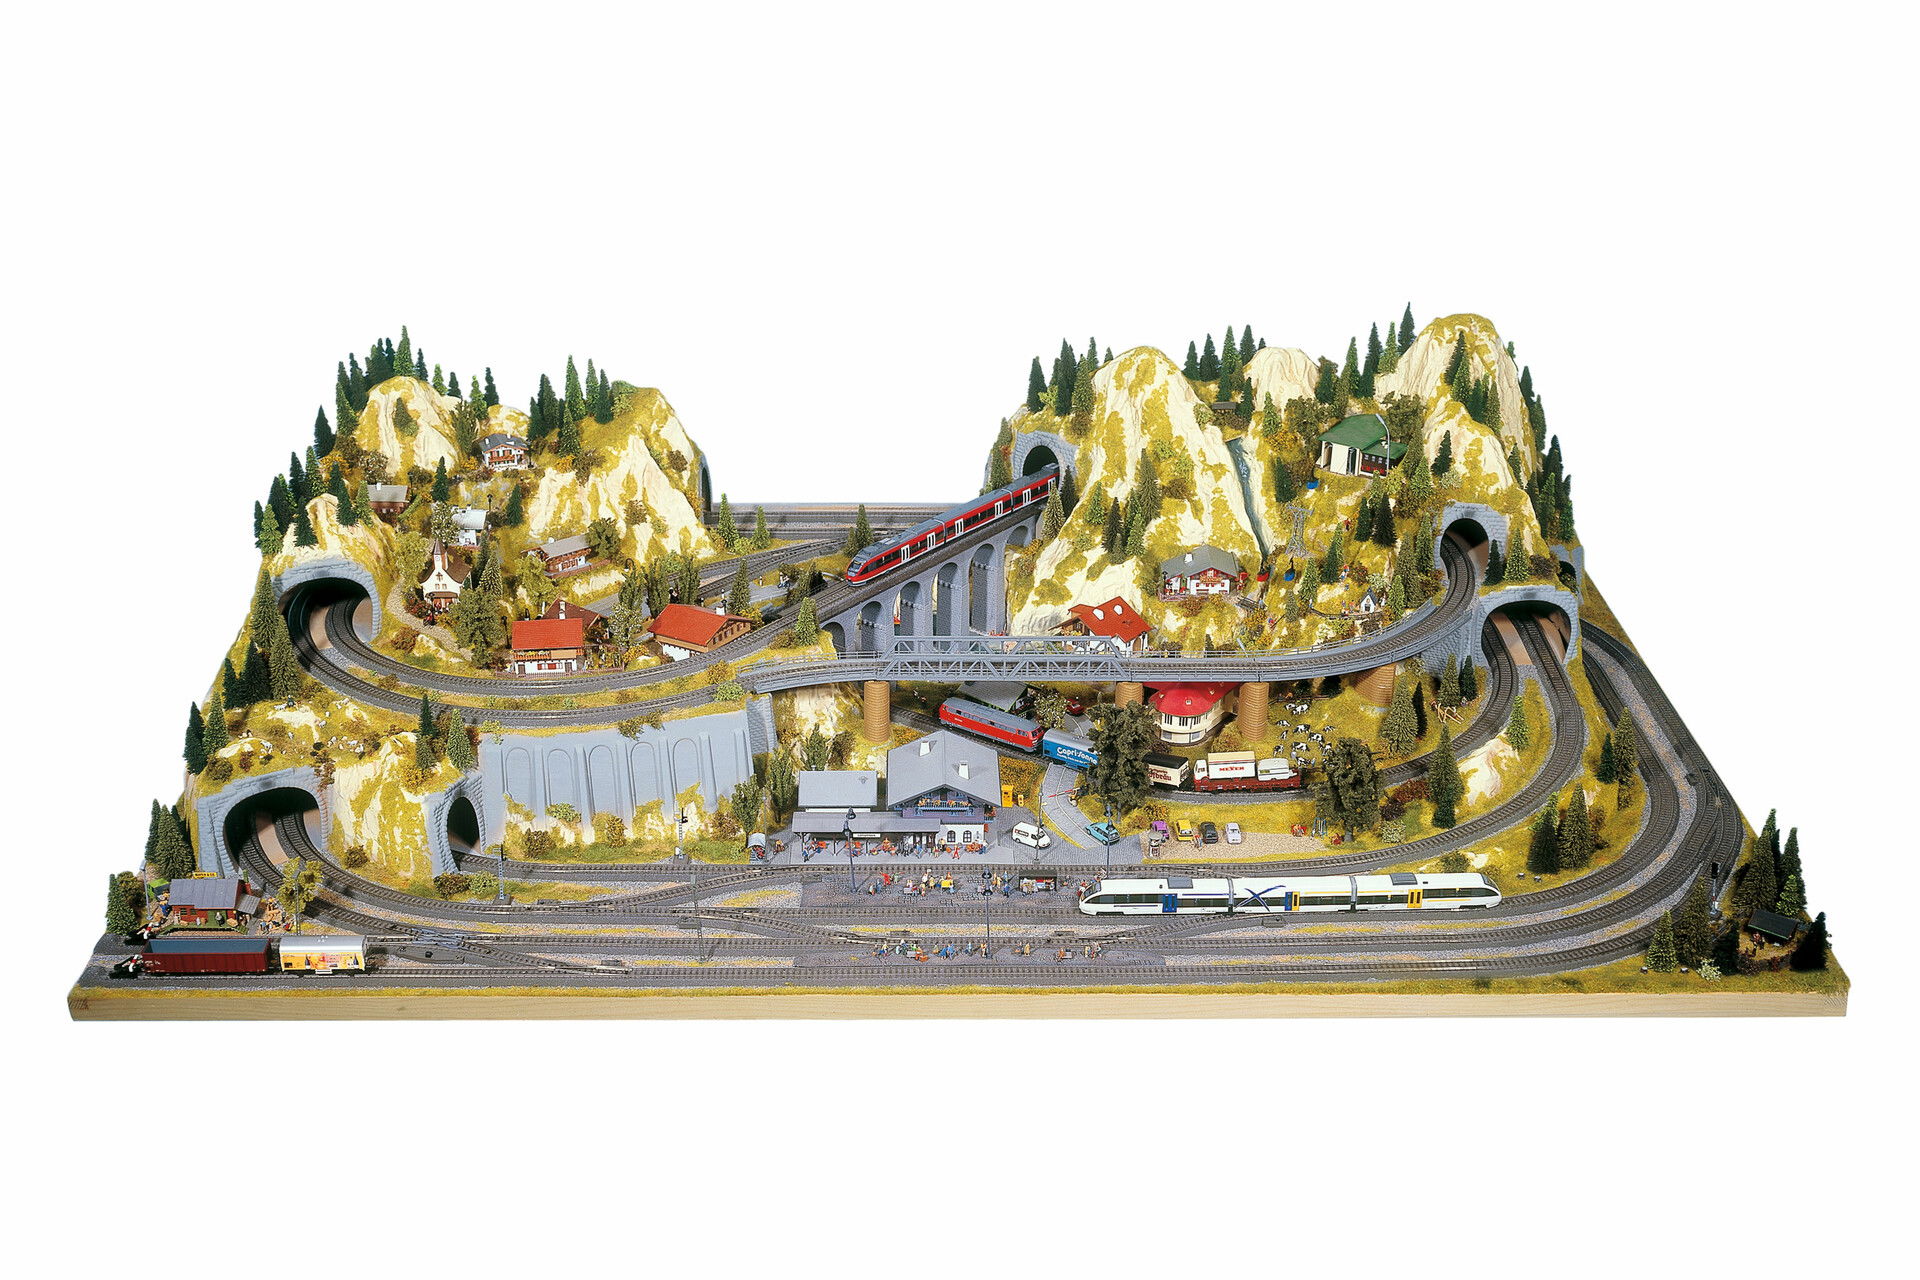
Build Your Own Layout in a Short Time
NOCH Preformed Layouts can be built in a short time without any special knowledge. The track plans help when laying the tracks, as they show the course of the rails made by various model railway manuf
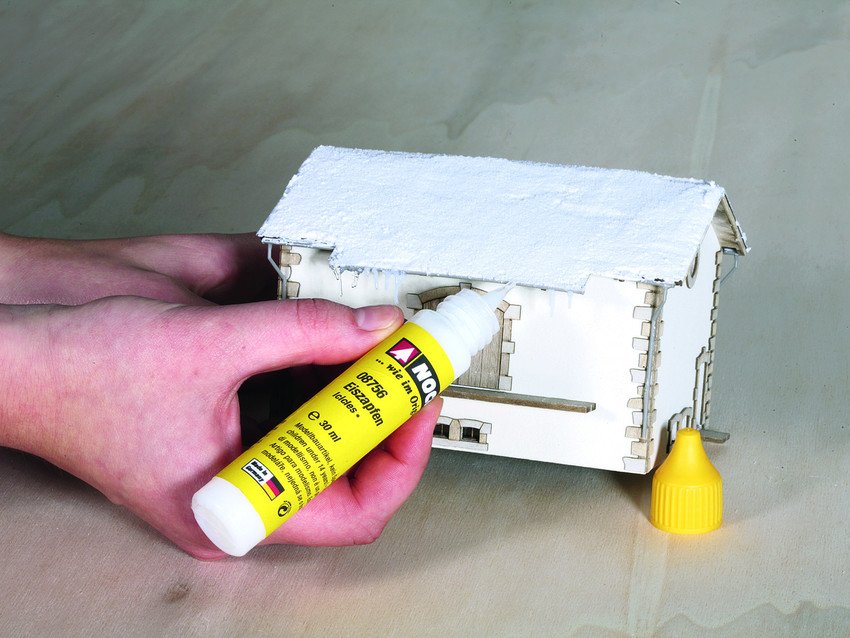
Create icicles in a short time
The Icicles can be applied to exposed places, such as roofs, bridges and transitions, straight from the tube. To do this, place the tube on the desired spot and carefully squeeze out the contents whil
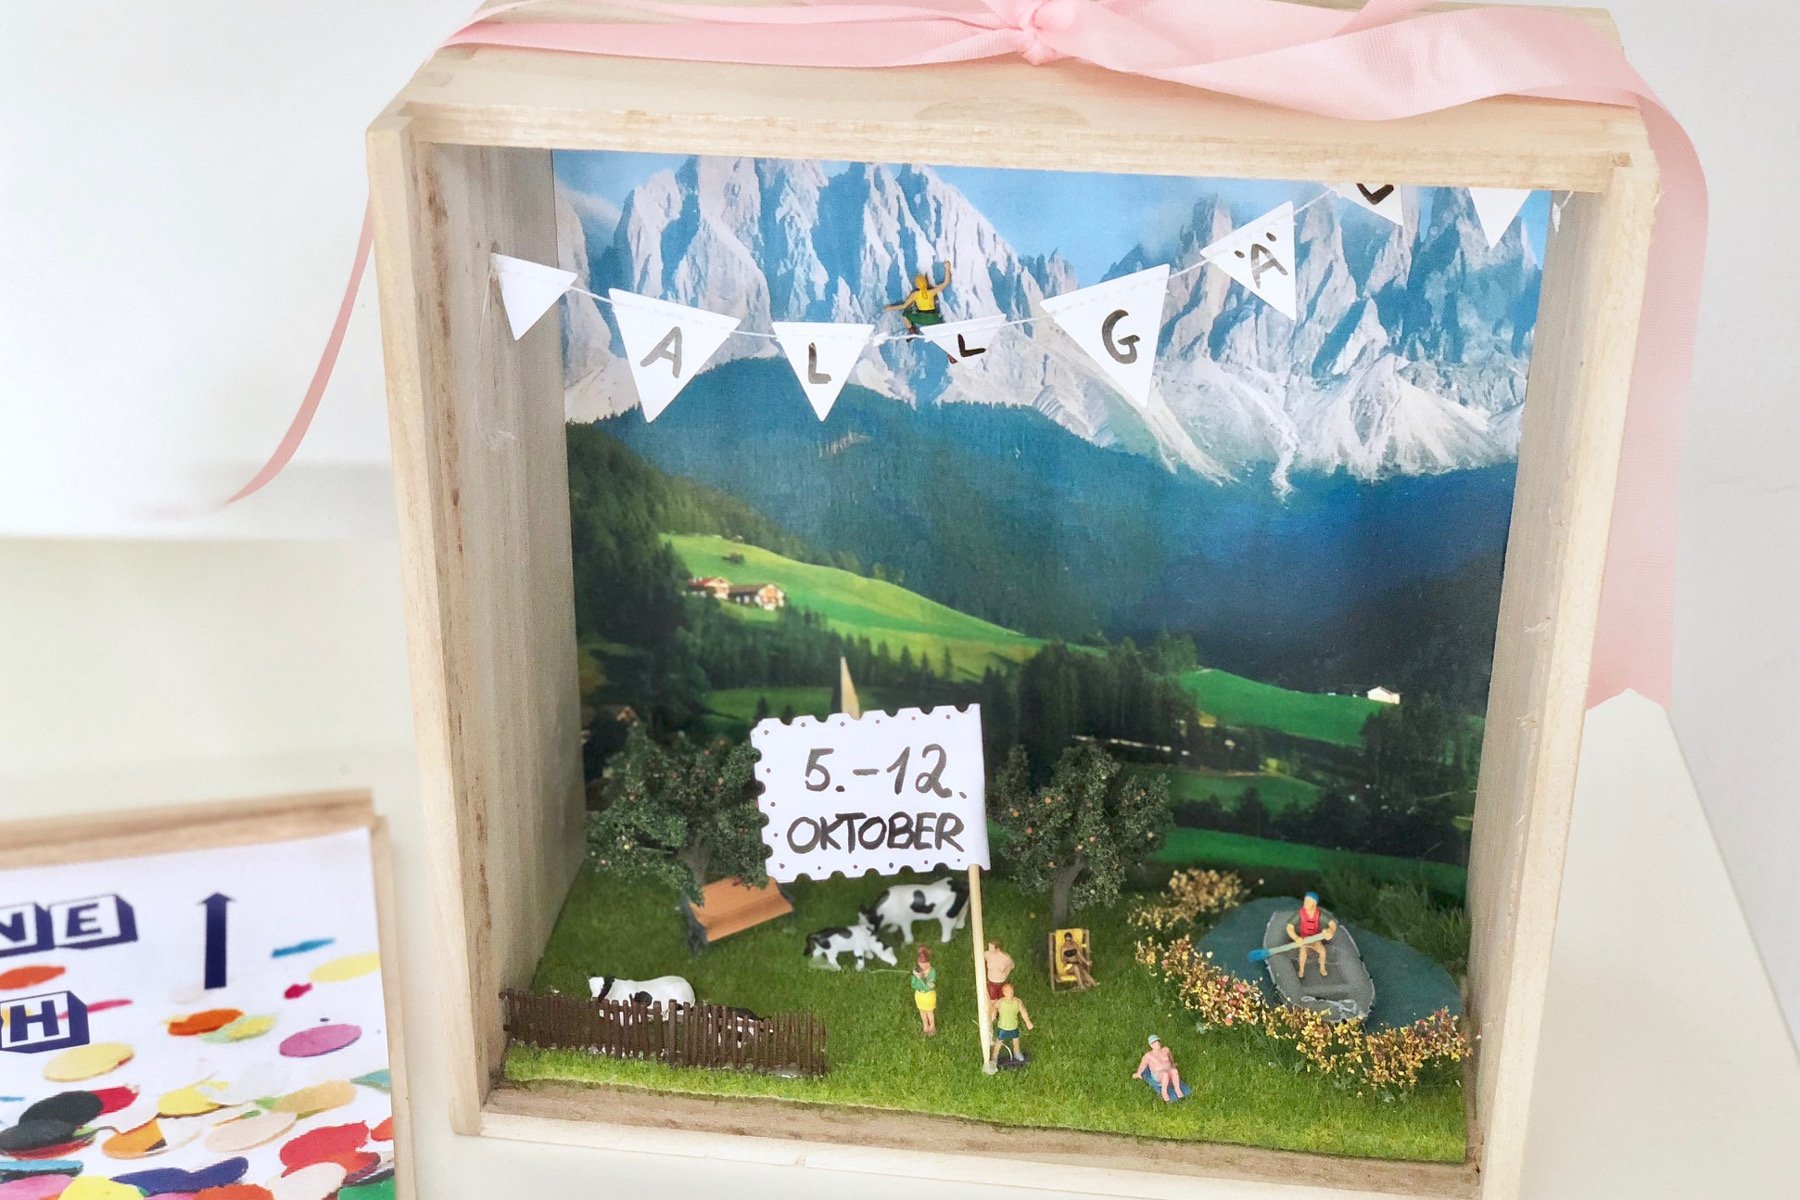
Off to the Allgäu!
You have to read this tutorial if you want to know how to make your own personal holiday voucher. Nowadays, everyone needs a little time out from everyday life and a relaxing short trip - e.g. to the Allgäu - is just the right thing. Whether for wellness or hiking in the mountains, a holiday is pure relaxation! Moni from decorize.de shows how to make a creative DIY holiday voucher!

Last Minute - but please personally!
Create a Christmas bottle gift tag. Christmas comes - like every year - sooo surprising! And just before, you remember that you should also put a present under the Christmas tree for mum, dad and aunt Erna. You can never go wrong with a good drop of wine. However, you always have a guilty conscience to show up with this standard last-minute gift. A remedy for this is an individual gift tag! Made in no time at all, it turns the wine bottle into a very personal gift! Let's get started - Christmas is just around the corner!
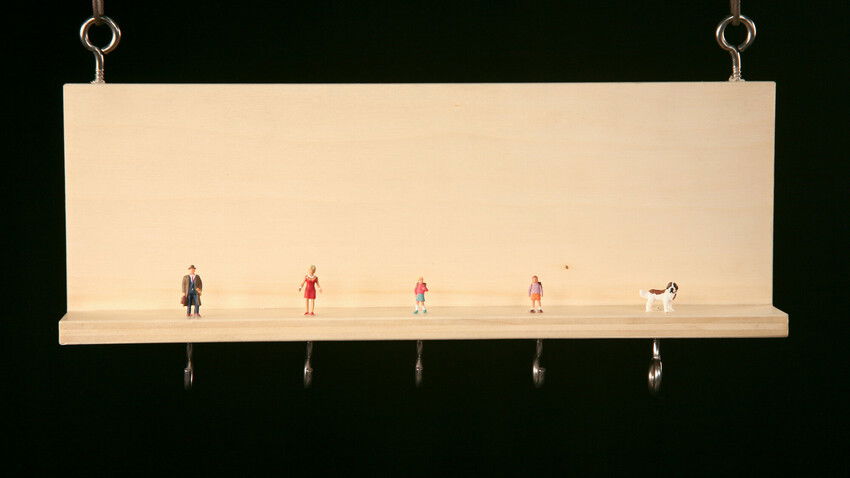
Keyboard
Um dem Schlüsselchaos entgegenzuwirken und sich die 10min Stress auf der Schlüsselsuche am Morgen zu ersparen, gibt es den folgenden Basteltipp für ein Schlüsselbrett für die ganze Familie.
The ideal glue for model meadows
NOCH Grass Glue was specially developed for electrostatic flocking.Compared to white glue, it stays open longer, which means that NOCH Grass Glue sets more slowly. So you can also add grass to lar